|
Decadent chocolate wedding cake recipes - recipe ideas and designs to achieve that unique chocolate celebration cake.
Make your own elegant wedding cake, or as many brides are lucky enough to have, a wonderful friend or relative to make their special cake as a unique gift to the couple. Design ideas for the cake can be discussed until the bride and groom know that they have got not only the chocolate cake of their dreams, but a special and unique design made especially for them, made with the warmest wishes for the couple's lives together.
A chocolate wedding cake is now one of the most popular to offer and enjoy at a wedding. So much so, that even if your own cake is not a chocolate one, everyone expects that a chocolate celebration cake is still on the menu!
And for a fun casual wedding reception, why not celebrate your day by having a chocolate fountain and celebrate your love of chocolate on your special day. Chocolate fountains provide a wonderful relaxed fun atmosphere. 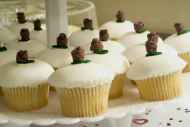
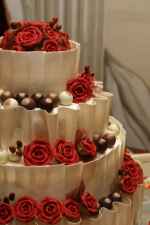
Another idea I also really love is the fairy cake tower, - individual fairy cakes, on a beautiful display stand. The cakes with various gooey fillings perhaps, but always smothered in a rich frosting, of chocolate ganache, or chocolate fondant icing, and decorated with meltingly pretty chocolate flowers, roses, butterflies, hearts, swirls and curls.
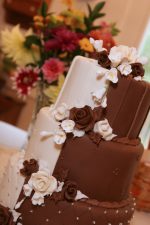
You do not need to be limited to the milk chocolate colour either; white chocolate makes an excellent wedding cake colour, creamy and stylish with a simple elegance or wild flamboyance. White chocolate provides a wonderful wedding cake colour backdrop that can then be decorated with wedding cake toppers, fresh flowers, decorative icings, and all sorts of chocolate concocted decorations. While a wedding cake made with dark chocolate could add a special contemporary edge to the celebrations - and looks stunning with deep rich colours, - or use edible gold leaf to edge beautifully delicate chocolate roses.
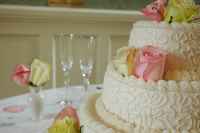
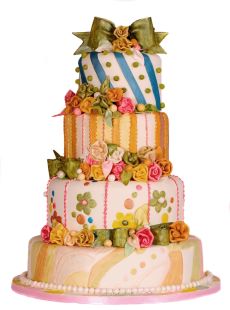
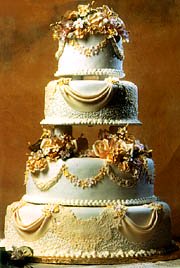
There are just so many designs for chocolate wedding cakes. This page has a variety of wedding cake photos or pictures to help you with ideas and designs.
I hope that ideas and pictures here spark your imagination and help you create your dream chocolate wedding cake; I know I have my favourites!
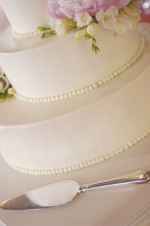
I have various recipes so that you can also make small samples of different recipes to try - to see which one is right for you and your wedding guests. This recipe here is a plain chocolate sponge cake, iced and decorated with white chocolate; a perfect wedding cake for chocolate lovers. Particularly good for that quintessential summer wedding as it has a rich butter cream filling flavoured with fresh strawberries, it slices easily and will serve up to 100 happy guests.
Here is a traditional three-layer wedding cake recipe: Chocolate wedding cake recipe.How to make a plain chocolate wedding cake with white chocolate icing and rich strawberry buttercream filling, well in advance. It's certainly a useful thing that the sponge layers of this cake can freeze and keep well for at least a month. You could make the large base cake on one day, and the more manageable middle and top layers on another day, for example. Once defrosted the cake layers and the icing will keep for up to three days before the big day. So, the wedding cake can be assembled a couple of days beforehand and kept refrigerated ready to be taken to the wedding party. You will need to have a good range of baking equipment to fulfil this recipe, including a 30cms cake tin, a 23cms cake tin and a 15cms cake tin, well greased, lined and floured throughout; an electric whisk, large mixing bowls, a sugar thermometer, a 35.5cms heavy cake board, a 30cms thin cake board, a 23cms thin cake board, six acrylic skewers or chopsticks, three metres of 2.5cm ribbon (colour of your choice), then stainless steel pins to fix the ribbons around the base of each layer to hide the joins between them. Ingredients Quantities for the 30cms layer of the cake, - the base. This will take around 60-65 minutes to cook in the preheated oven. 275g of quality plain chocolate 150g of plain chocolate 225ml of water 12 eggs 375g of caster sugar 290g of plain flour, sifted Quantities for the 23cms cake, - the middle layer. This will take approximately 40-45 minutes to bake in the preheated oven. 250g of good quality plain chocolate 60g of plain chocolate 125ml of water 7 eggs 200g caster sugar 150g of plain flour
Quantities for the 15cms cake layer, - the top. This will take approximately 35-40 minutes to cook. 150g good quality plain chocolate 6 tablespoons water 5 eggs 150g caster sugar 125g plain flour, sifted
For each layer of the cake follow the method instructions here: Put the chocolate and the water in a small saucepan and gently bring to the boil. Remove from the heat, stir until well blended, and leave to cool. Break the eggs into a large heatproof bowl and place over a saucepan of hot, but not boiling water. Use your electric whisk to whisk the eggs with the caster sugar until they are doubled in volume and thick enough to leave a ribbon-like trail. That is about 25 minutes for the large base, 12 minutes for the middle 23cm cake tin quantity and 10 minutes for the five-egg quantity. Sift the flour over the egg mixture, a third at a time, folding it in very carefully. Then fold in the melted chocolate. Pour into the appropriate prepared cake tin and bake in the preheated oven for the required length of time. Check by inserting a skewer; it should come out clean from the centre of the cake. Leave to cool for a few minutes, and then carefully turn out the cake to cool on a wire rack. Buttercream filling 18 egg yolks 625g caster sugar 350ml of water 1.5kg of unsalted butter, softened 250g strawberries To make the buttercream, put the egg yolks in a large bowl and whisk until they are pale and thick. Put the sugar and water into a heavy-based saucepan. Simmer covered for around one minute dissolving the sugar. Then remove the lid and boil until the syrup reaches 115C on a sugar thermometer. Gradually pour the hot sugar syrup onto the eggs, avoiding the beaters as you beat constantly - not easy, but have a go. Continue beating until the mixture has cooled to room temperature. Cut the softened butter into small pieces and beat them into the mixture, a few at a time. Set aside a third of the buttercream mixture, and with the remaining two-thirds firstly mash the strawberries and then beat them thoroughly in. To make the white chocolate ganache icing: 1.15kg white chocolate chopped into small pieces. 400ml of double cream Follow the melting methods to melt the chocolate carefully. Bring the cream to a gentle simmer, remove from the heat and leave to cool, and then stir the cream into the melted white chocolate; stir to blend. When ready to put the cake together, slice each of the three cakes in two horizontally. Then use the strawberry buttercream to fill between the middle of each cake layer. Place each of the cakes on to their appropriate sized thin cake boards on top of a rack, with a plate or foil underneath to catch the drips as you pour the white chocolate icing. Pour a thin layer of the plain buttercream over each cake, returning to the bowl any buttercream that drips. When covered place all three into a fridge to set the buttercream. When the icing is cool enough to be spreadable, carefully pour the mixture over each cake to completely cover the top and sides using a palette knife. Also, spread a thin layer over the biggest (base) thick cake board. Leave the icing to set. When ready to assemble the cake, follow the instructions as for the chocolate mousse cake recipe. This time though, cut the acrylic skewer just at the top of the cake surface to offer support to the middle then the top section of the wedding cake. That is a simple wedding cake to make; all it requires are some decorating ideas to make it into a spectacular and beautiful wedding cake. Start by pinning the coloured ribbon around each cake base, and then look at design ideas to decorate the cake to the theme you love most. For information on wonderful chocolate wedding cakes in London UK see this site to find more great chocolate decorating ideas. (wwww.lvcc.co.uk/chocolate.asp)
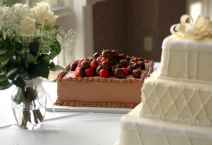
White chocolate mousse wedding cakeThis white chocolate wedding cake recipe is an elegant three-tiered design with a rich gooey chocolate mousse filling covered in cream and masses of white chocolate curls. This recipe makes enough for 60-80 slices. You will need three cake tins, thoroughly prepared by greasing with a white vegetable fat round the tins and lining with greaseproof paper. Decorate the cake with fresh flowers to complement the theme or bouquet of the bride. Make the chocolate curls for decoration in advance; they can be stored in an airtight container in the fridge or freezer for up to two weeks. It is probably best to bake each layer one at a time, and do not attempt if you do not have a range of good baking equipment to hand, particularly an electric whisk, but also a big bowl for mixing the largest cake. The baked undecorated cakes can be kept frozen, and will thaw overnight at room temperature. The wedding cake can then be stored, and decorated the day before the wedding, then stored in a cool place. Preheat the oven to 180C, 350F, gas 4. When assembling, you will need thick pieces of cardboard the same size as the middle and top cakes to support them on the chopstick supports required to build the cakes on. You will need 16 wooden chopsticks or acrylic skewers and a sharp Stanley knife, as you will need to place the chopsticks into the base and middle layers of the cakes and then be able to cut the chopsticks about 2.5cms above the height of the cake, to place the layer above on. More on assembling later, though remember that once assembled this cake cannot be moved!
Ingredients
Quantities for the 35.5cm cake - this will take approx 1 to 1¼ hours to bake. 200g butter 14 eggs 400g caster sugar 275g plain flour 125g cornflour
Quantities for the 28cm cake. This size will take around 40-45 minutes to bake.
125g butter 8 eggs 225g caster sugar 200g plain flour 25g cornflour
Quantities for the 20.5cm cake. This will take around 30-35 minutes to bake. 75g butter 6 eggs 175g caster sugar 150g plain flour 25g cornflour
For the mousse filling, these quantities are the amount needed to fill all three tiers of the wedding cake. 700g plain chocolate, or white chocolate, 120ml brandy 8 eggs, separated 1.1 litres double cream 20ml powdered gelatine
For the decoration 1.1 litres double cream white chocolate curls made from 1.1kg of white chocolate. icing sugar fresh flowers Having made one layer of the cake, follow the same steps for each subsequent one. Put the butter into a saucepan and heat gently until melted, then remove from the heat. Place to one side to cool slightly. Meanwhile, place the eggs and the sugar into a large bowl over a saucepan of hot water and whisk with your hand-held whisk until the mixture is very pale and creamy and thick enough to leave a trail on the surface when the whisk is lifted up. To give you some guide, the large cake should be whisked for 25-30 minutes, the medium cake for 15 minutes, and the small cake for about 10 minutes. Remove the mixture from the heat, and continue whisking until cool. Sift the flours together into a bowl. Fold half of the flour into the creamy egg mixture with a metal spoon. Pour half the cooled butter around the edge of the mixture and fold in very lightly and with great care or the butter will sink and the result will be a heavy cake. Gradually fold in the remaining flour and the melted butter, carefully as before. Pour the mixture into its required size of tin (already prepared). Bake in the preheated oven for the required time. When cooked, each cake should be well risen, firm to the touch and just shrinking away from the sides of the baking tin. Wrap and store as required, in the freezer if made up to four weeks in advance. Defrost when ready to assemble the wedding cake. To make the mousse, melt the chocolate, then remove from the heat and stir in the brandy and the egg yolks. Whip the cream until it just stands in soft peaks and fold it in to the chocolate mixture. In a small heatproof bowl, sprinkle the gelatine onto 60ml of water. Stand the bowl over a pan of simmering water and stir until the gelatine has thoroughly dissolved. Cool and then stir into the chocolate mixture. Whisk the egg whites until stiff and then fold in, carefully. Cut each cake horizontally in half. Putting the bottom half back into the appropriate cake tin, and judging the amount to divide the mousse between the three layers, pour on the amount of mousse required. Chill to set. Put the second half of the required layer of sponge back on top of its mousse-covered base. Carefully take each cake out of its tin. You are now ready to decorate the wedding cake. For the decoration, whip the cream until it just holds its shape. Place the base and largest layer of the cake onto a cake board and cover with a thin layer of cream. Place the middle layer onto the thick cardboard, - please see above. Push a chopstick or acrylic skewer into the middle of the base of the cake. Mark 2.5cm above the risen cake, withdraw, and cut the chopstick to the required length. Cut seven more to the same length. Insert the chopsticks into the large base cake layer, in a circle. Stand the middle layer cake on the chopsticks and check that it stands level. Remove the middle layer and repeat the procedure as undertaken with the base of the wedding cake. Then repeat with the smallest cake on the top, cutting eight more chopsticks to achieve a stable structure. With each cake back on the boards again, cover the middle cake and top cake, so all three layers are then well covered with the whipped cream. Cover all the cakes with the white chocolate curls and dredge with icing sugar. Assemble this cake where it is to be served, stacking the cakes one on top of the other and decorate with fresh flowers as desired. You could also purchase a three-tiered cake-stand, so that on the day the wedding cake can just be filled with the white chocolate mousse and covered with the whipped cream and chocolate curls, which would certainly be preferable on a hot summer's day.
For more chocolate wedding cake recipes go to rich dark and very glamorous chocolate wedding cake recipe page!
Return from chocolate wedding recipe page to best chocolate recipes online home page. |
 As a result, your recipe can also be as simple or as sophisticated as you want; contemporary or traditional flavours and designs to fit in with whatever the theme is for your wedding day.